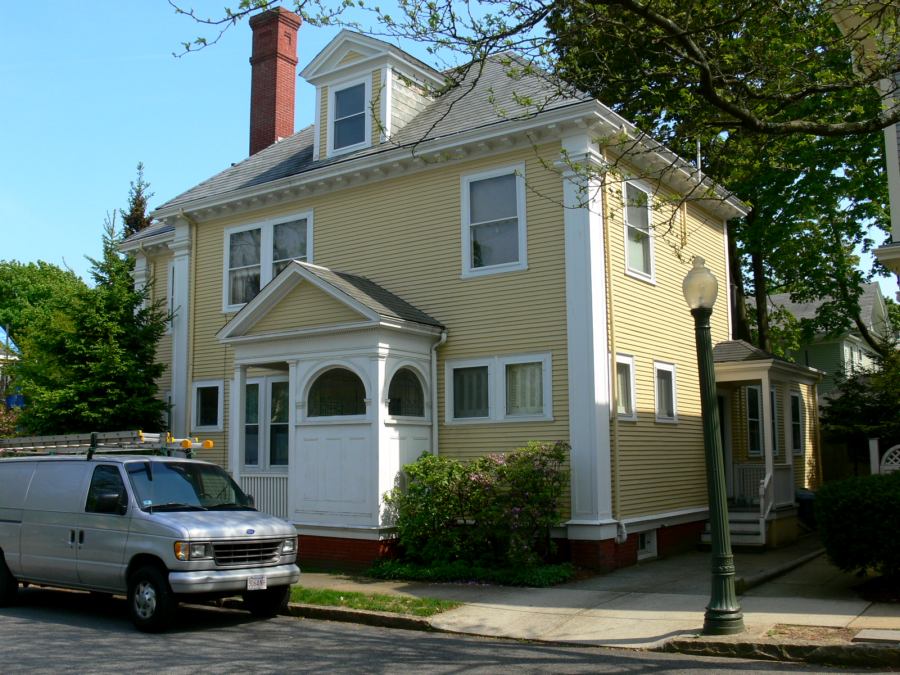
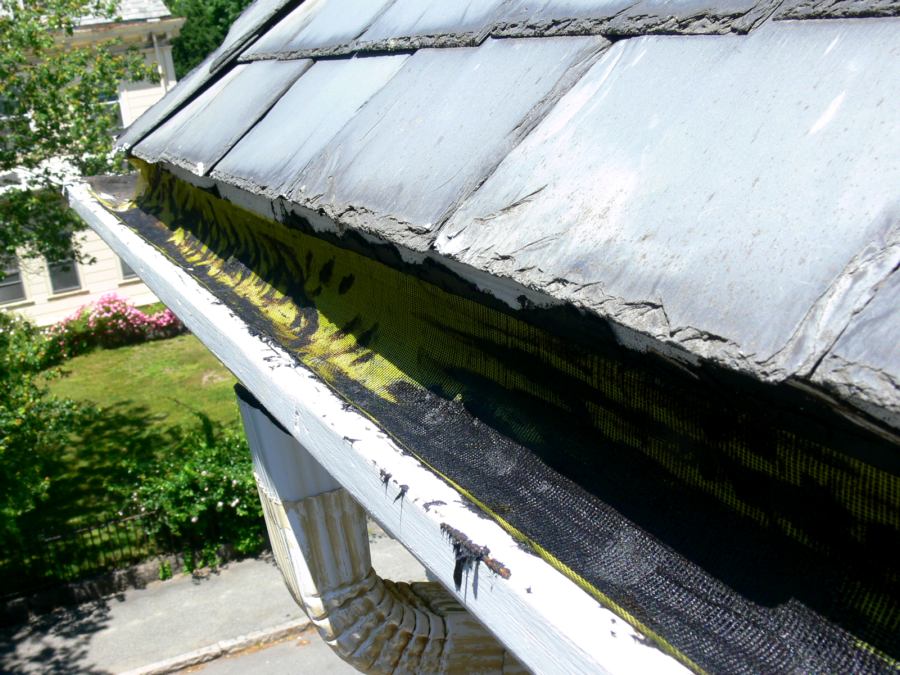
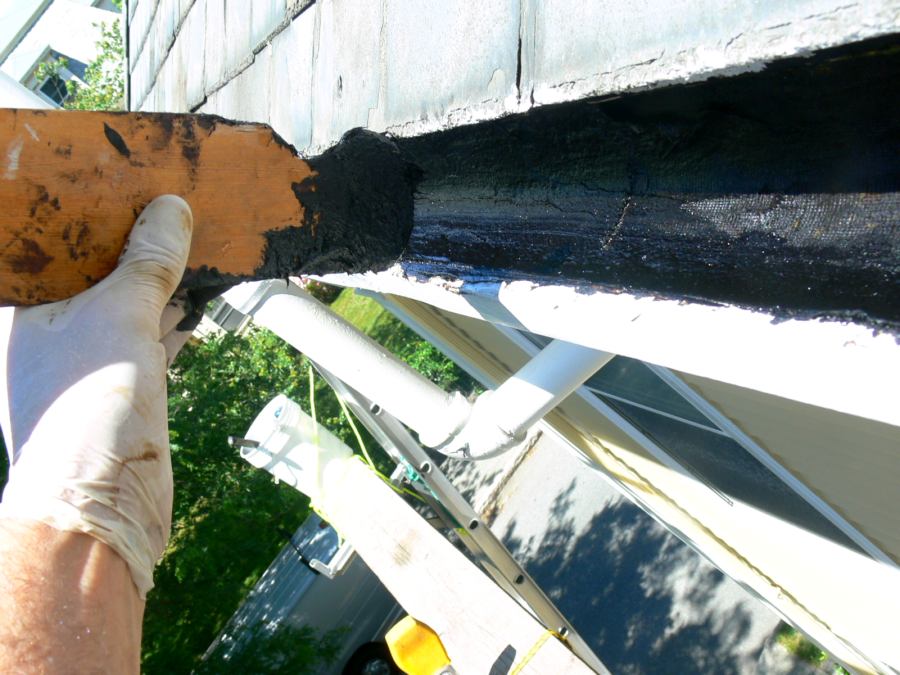
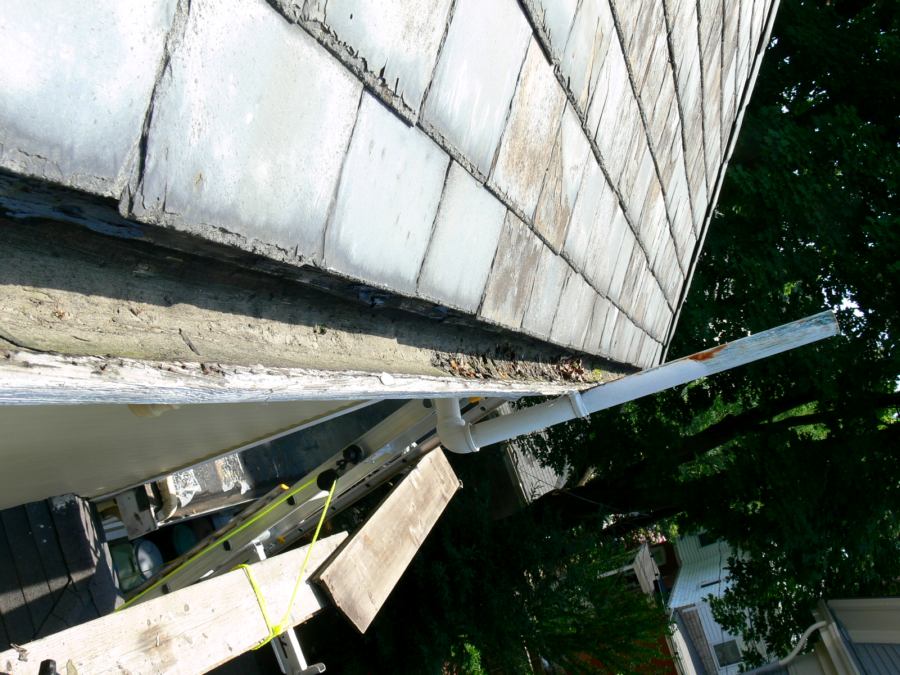
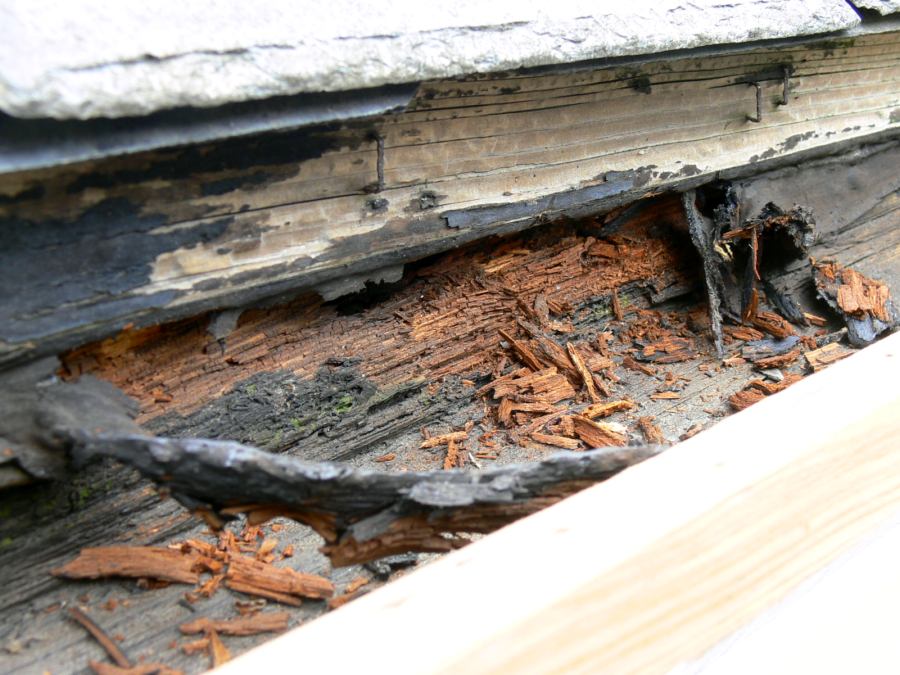
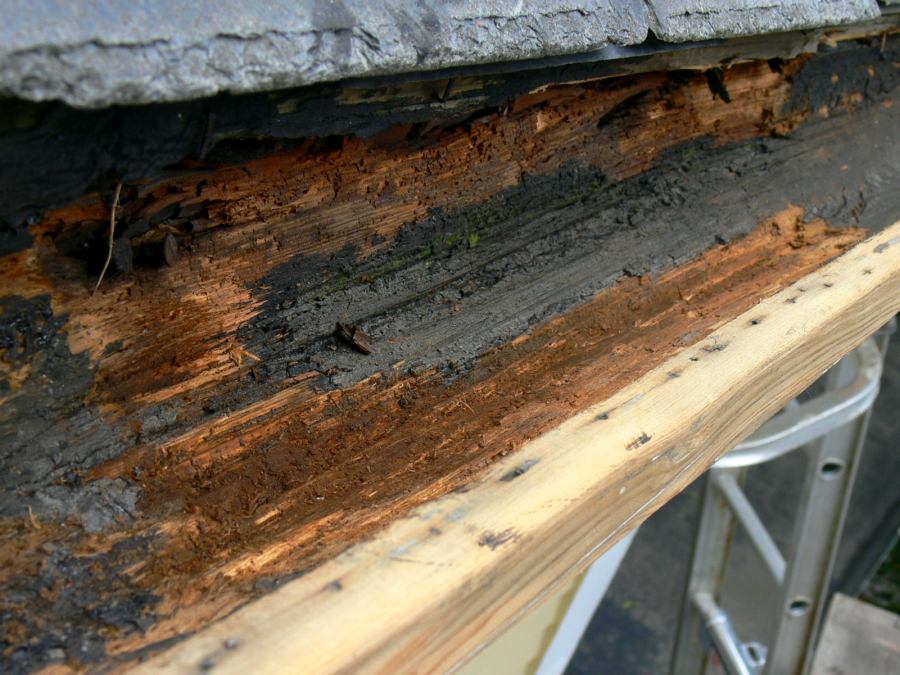
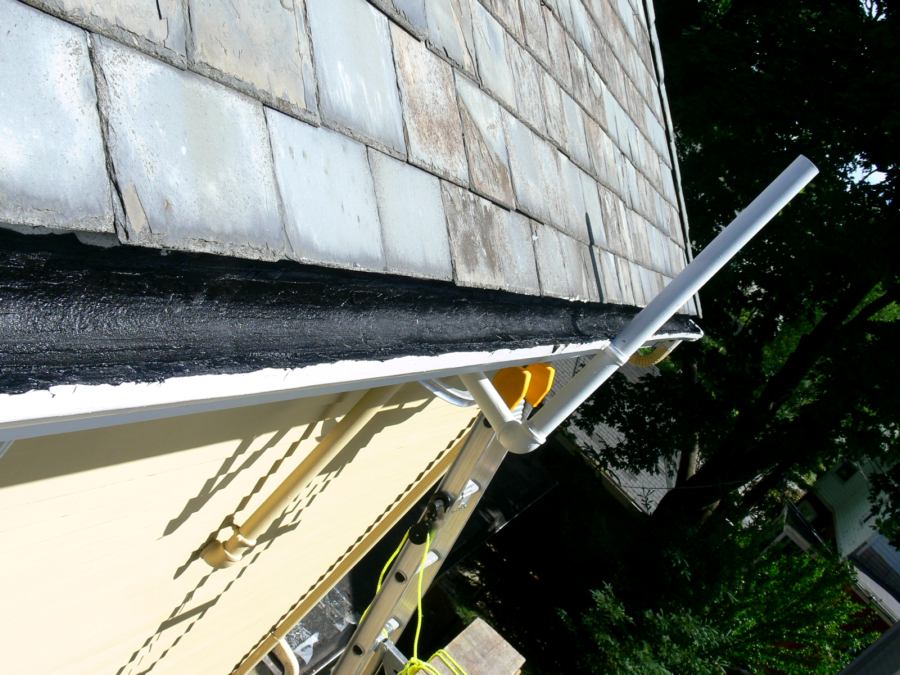
How to repair a leaking 100 year old wooden gutter


  • Beautiful cornice on this c1910 building in New Bedford, Ma (Georgian architecture)

  • Water has been leaking on the west side near the back entrance


  • This wood gutter looks like a large crown molding because its back half is recessed into the cornice.

  • If water spills over the back of this type of wooden gutter it will get inside the cornice and down the wall (if the soffit is not pitched away from the building).

  • The black staining on the gutter face tells of repeated overflows. Notice no staining near the drain pipe (left). That says to me building settling has occurred and the leader is now uphill.


  • This mass of dried out leaves and maple seeds shows this to be the lowest point. It is too large for a gust of wind to disloge.

  • The organic matter that collects here helps keep the wood underneath wet, a recipe for rot.

  • So gutter pitch carries the junk to the lowest point, and if this is where the drain was, it would be clogged.


  • With the dried mass of leaves and seeds removed it obvious someone has been here before with a can of roofing tar.

  • Tar without embedded reinforcing will not last.

  • Its always the low points in wood gutters where problems are found. (think building settlement)


  • Crumbling wood, not a good sign.

  • The "show" side of this wood gutter looks perfect, but this unseen part has major problems.


  • The wood is soft and still wet so more excavating will be necessary.

  • The profile of wood gutters that are available today do not match this older gutter on both the inside and outside surfaces. Patching in a piece is not an option here.


  • A little scrapping with a teardrop scrapper and the soft wood turns to crumbs.

  • Its obvious that water has been leaking through the back of this wooden gutter.

  • Nine out of ten contractors would show this photo to the owner and recommend all new aluminum gutters. I would not however because it would destroy the character of this beautiful building (it was built with whaling money).


  • The real soft wood is out now. The wet wood that remains is soft enough to be removed with a pointed scrapper. Only sound wood should remain.


  • This angle shows how extensive the damage is to the back of the wood gutter, yet two stories down it looks fine.

  • Notice how the roofing slates are poorly supported by the esisting facia board. (the leaf blower has them flapping). A new taller facia board will hold them nice and tight.


  • I dug down hard until no more soft wood came out.

  • Then I mixed Durabond-90 plaster and filled the void.

  • I've repaired a lot of old plaster with Durabond. This plaster sticks to everything and if mixed with accelerator never cracks, no matter how thick it is applied.


  • The next day we had a soaking rain.

  • Sheetrock turns to mush when it gets wet, real plaster just gets harder.

  • Do not replace old plaster with sheetrock because of cracks, rather skim it with Durabond plaster!

  • If a 2nd floor toilet leaks, or your roof, a sheetrock ceiling below will have to be torn out because it turns to mush. If you had real plaster, all you'd have to do is paint the water stain.


  • I scraped the entire length of gutter removing any soft wood.

  • Then I filled in any low spots.

  • Just before the plaster sets hard, it can be scrapped and contoured.

  • I also replaced the old cracked and split upper facia (that the roof slates rest on) with pressure treated stock and primed them.


  • Now, so that nobody thinks I'm nuts, I'm going to line this gutter with roofing tar that will bury the plaster patch. I'll embed a reinforcing fiberglass mesh to ensure the liner never cracks.

  • No one will ever know how Durabond saved the day.


  • First work the tar to stick it well to the wood, then press in the fiberglass mesh.


  • ...and then double back with a second coat sandwiching the mesh in the middle.


  • This repair should last decades.

  • Once the tar solvents evaporate the gutter linning will be dry and smooth, ready for the wind to do its periodic cleaning.

  • I also added a new new leader and drain piping at the lower end. This gutter should drain completely now.


  • I went around the entire house inspecting the gutters last December. It has been a few years since I did this repair in 2007. I was pleasantly surprised to find not a single maple seed (whirly bird).

  • Its true, natures wind does clean wooden gutters with their smooth round interiors, unlike their aluminum counterparts with their square bottoms and obstructing hangers.


  • And this building lives under some massive maple trees!
  • Today's contractors don't want to repair anything. They want to install new. New is faster and easier for them but not better for you. All your old growth wood gutters and fascia boards go to the landfill and you wind up with thinner pre-primed pine fascia boards that are highly prone to developing black mold and rot (so that too might be covered in aluminum coil stock) and inexpensive aluminum gutters. The contractor makes a sweet profit and your house will loose its historic cornice and take a big hit in the aesthetic value department.