

North gutter |
South gutter you are here |
East gutter |
rubbered flat roof |
|
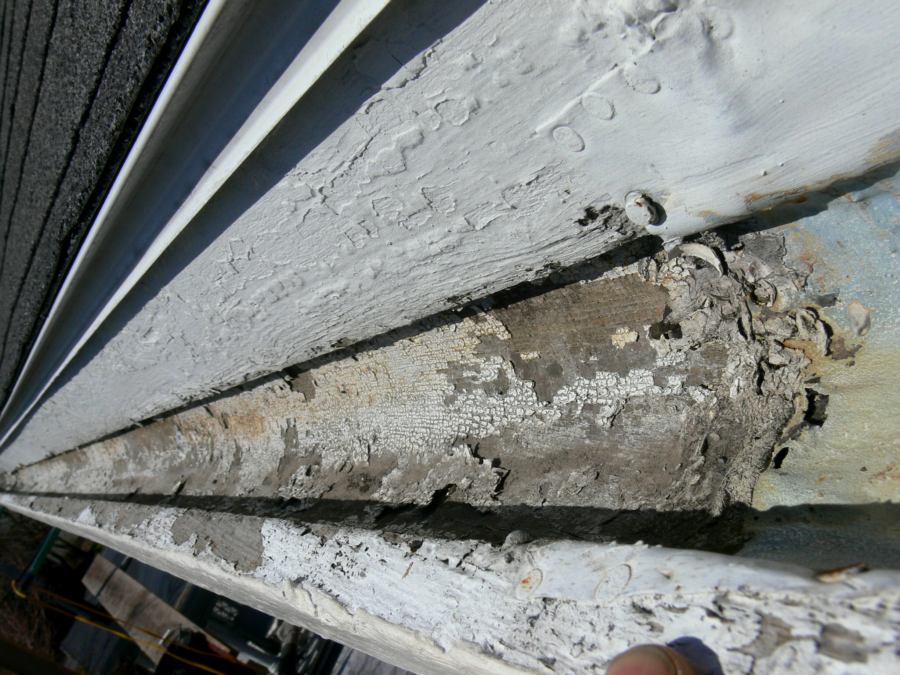
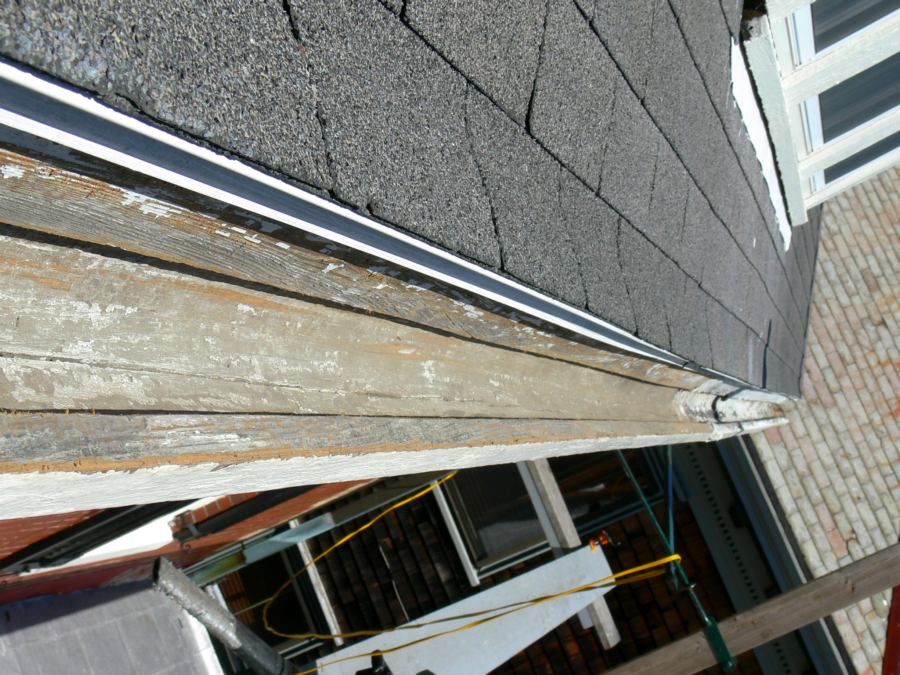
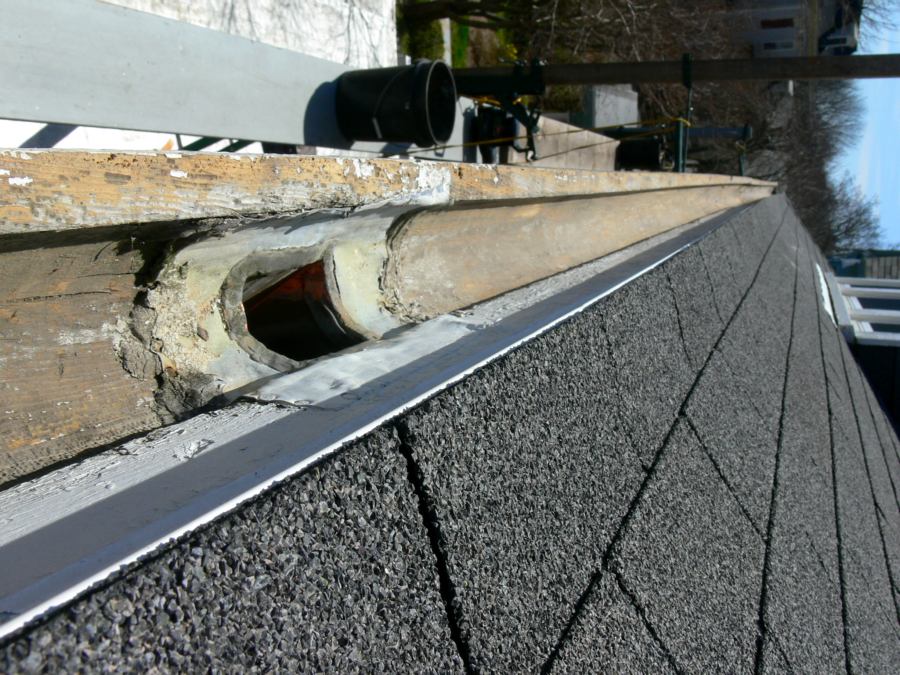
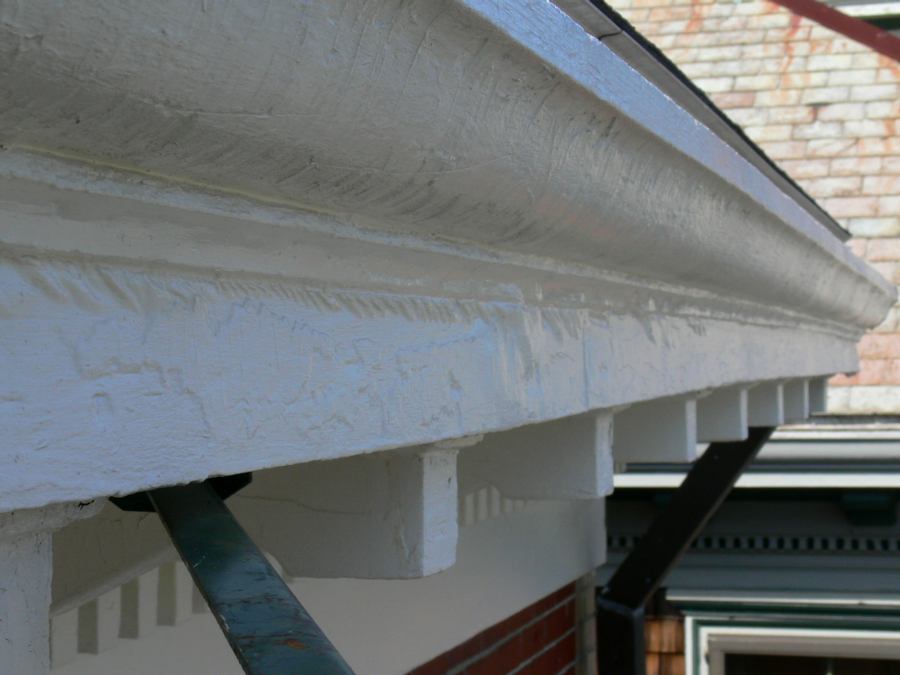
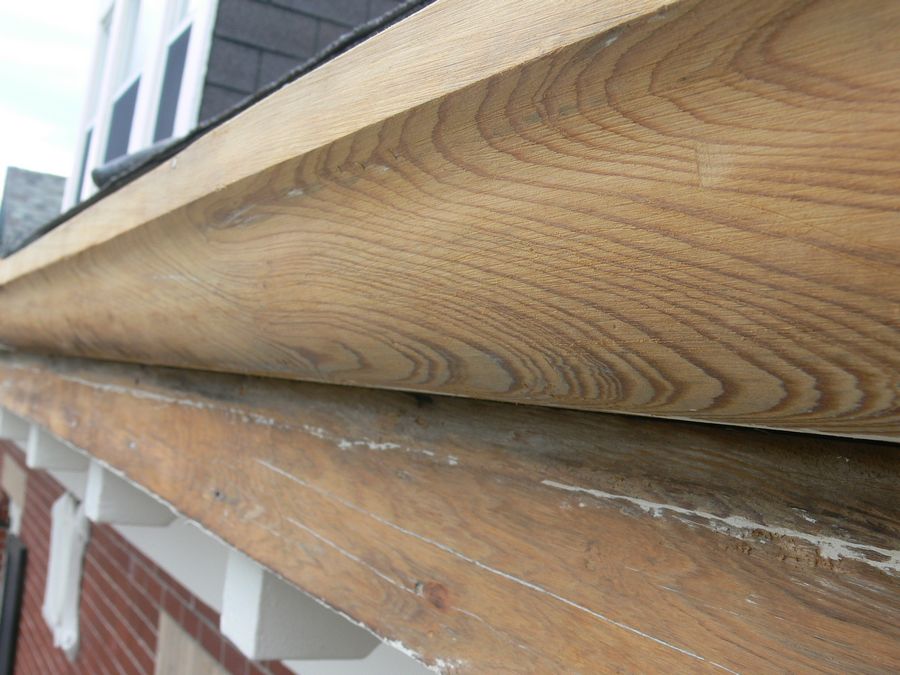
| - 01 - No one will ever come up here and clean these gutters yet all I found was asphalt roofing granules (which I just removed with a leaf blower). Unlike aluminum gutters with their hard inside corners and obstructing hanger brackets, open wood gutters with their gentle inside curved bottoms are self cleaning by periodic wind gusts. (contractors that sell very profitable aluminum gutters will never tell you this). Interesting that paint was used to protect the inside of this wood gutter from the elements. Looking at all the tiny cracks in the paint tells me this is oil paint. It is the expansion and contraction of the wood that causes inflexible oil paints to crack. Wood massively expands when it wets and massively contracts when it dries. At first the paint prevented the this by sealing the wood but once it began to fail the wood resumed a wetting and drying cycle and the remaining paint was doomed. Thermal expansion/contraction movement is no where near a great as that from the wetting and drying cycle. |
| - 02 - Rarely will someone move a 28' ladder every few feet all around this house so as to oil these gutters. Luckily there are highly UV resistant, flexible, strong adhering products today that can coat and seal these wood gutters (as you'll see at the end of this webpage). Stopping the wetting/drying cycle is very important because this is what causes the joints to open and close. The gutter on this house, and numerous others like it, are recessed into the cornice for aesthetic purposes. So any joint that leaks will allow water entry into the eave wetting the soffit and framing. The result will be paint failure at best and rot if the wood is not a rot resistant species. As a fail-safe it like to install an invisible vent whenever possible to allow for drying. |
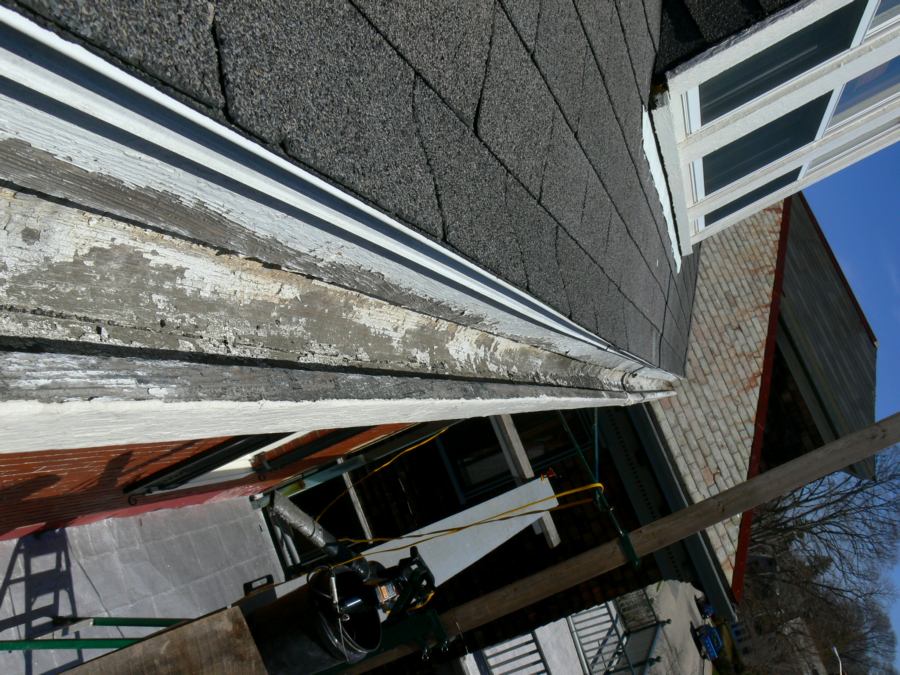
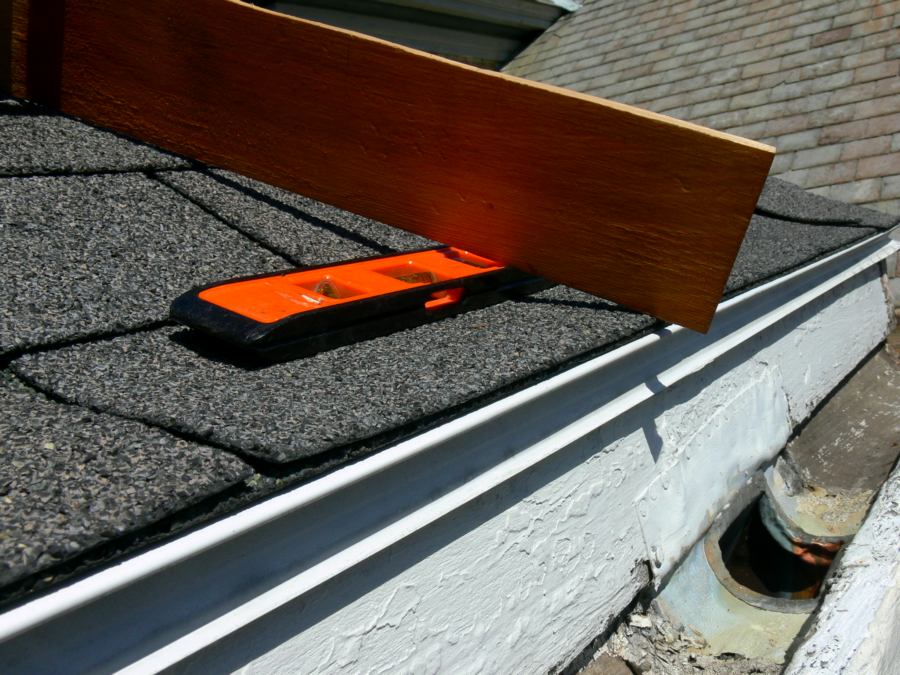
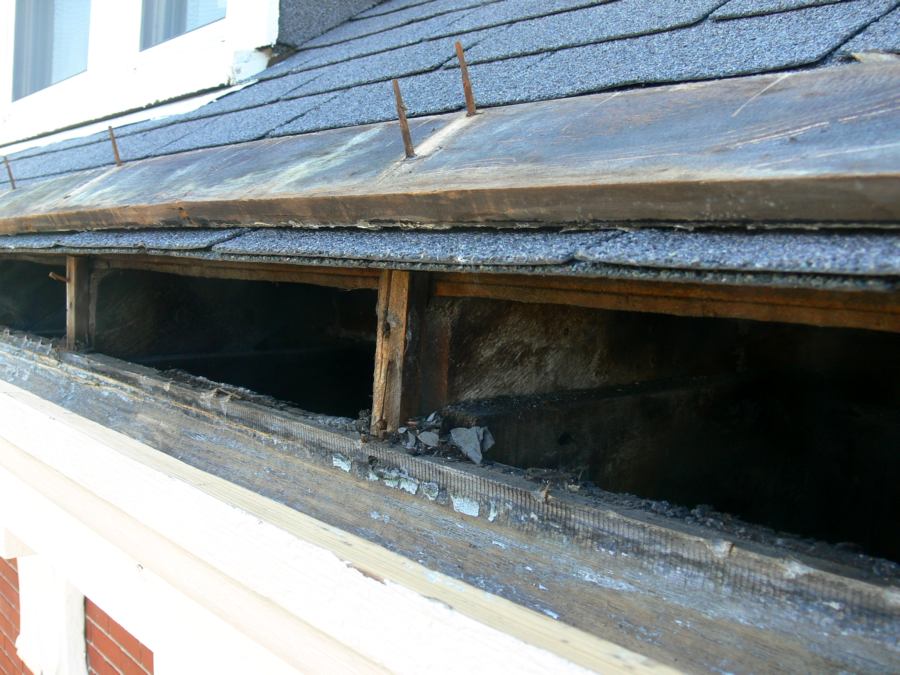
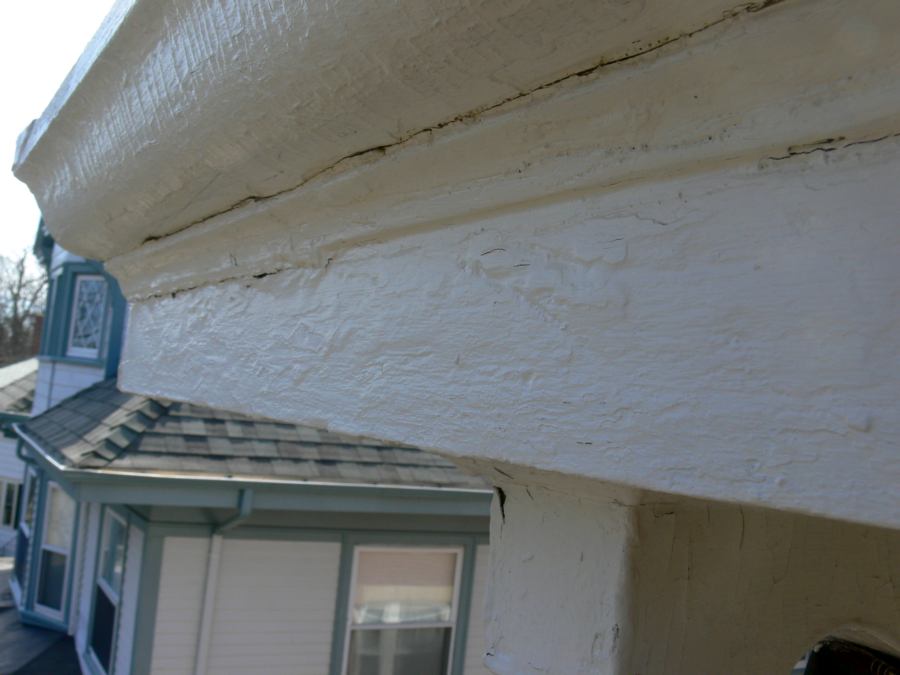
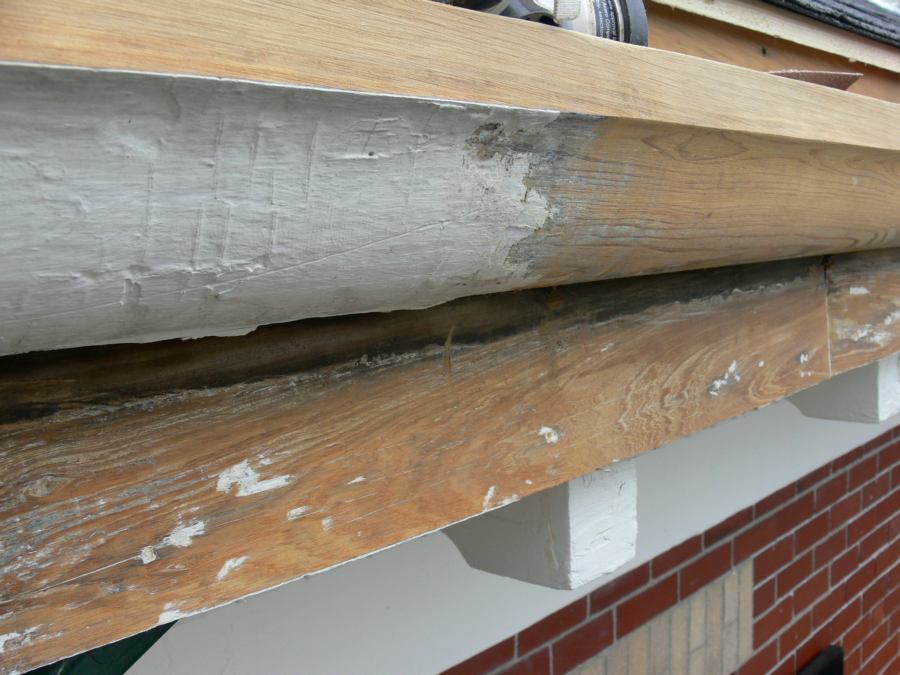
| - 03 - Failing paint and or staining are the tell tale signs of a water problem. Since the owner had all the trim painted last year, problem areas are difficult to spot. However I was building a mahogany deck here in late winter and noticed icicles hanging from all the joints so they need attention. Notice anything strange about the the first course of roofing in this photo? |
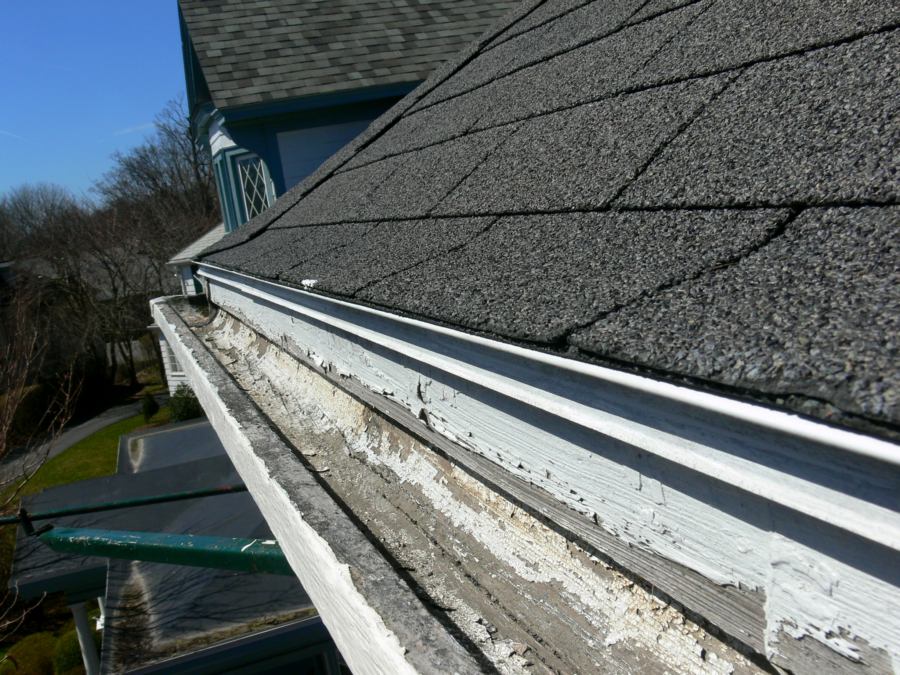
| - 04 - The roofing on this 100yr old house was originally slate. Slates would not bend and sink into the hollow created by the fascia being taller than the roof deck. The asphalt shingles at the eve line are nearly flat so water would have no problem leaking between the joints where the shingles butt together. Peaking under the shingles reveals no water and ice membrane underlayment is present to prevent this type of water entry. |
| - 05 - To rectify this problem the 1st few courses of roofing could be taken up and fascia boards planed flush with the sheathing or... the fascia boards could be removed, ripped down and reinstalled. |
| - 06 - This wood gutter may look like junk but after some scrapping and sanding I guarantee it will look brand new. The rounded end of a teardrop shaped scrapper will make fast work of getting up the old paint. |
| - 07 - Here is the west section scrapped out. That was easy. I can't imagine any roofer not seeing this high fascia problem and correcting it. I imagine the boss was yelling at them to hurry up he was loosing profit, lol. Roofers love to show off and brag how fast they roof. |

| - 08 - This joint in the middle of this 30' run has been worked on many times. Each time someone added more tar or caulking trying to seal it. What they did was raise it up so the water was held back from moving to the leader. This is all coming out. |
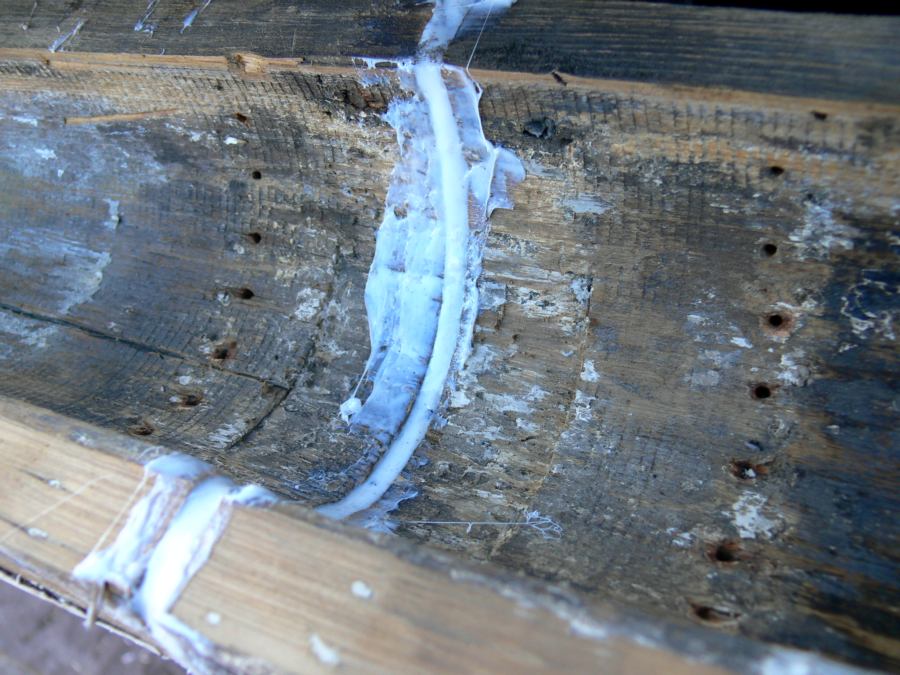
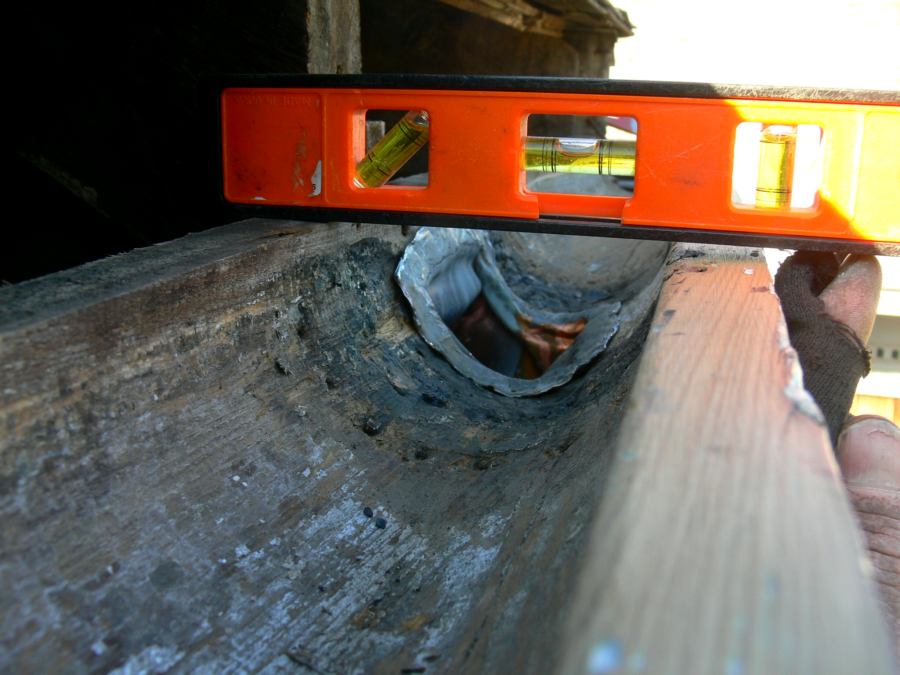
| - 09 - This is how to seal a wood gutter joint, with highly elastic tri-polymer sealant made by Geocel that can be purchased online here. This product boosts "guaranteed adhesion" and "lifetime durability". I forced this elastomeric sealant all the way through the joint after clearing it with a saws-all blade and the 160mph leaf blower. Notice the original lead was small in width and properly mortised in. The newer larger leading was non-mortised and secured with oversized nails adding excessive penatrations in the wood. This was not an improvement over the original work. |
| - 10 - All the old paint has been scrapped out and this 100 yr old old growth cypress gutter and it looks as good as the day it was installed. This is on the soulth side too where the gutter bakes in the violent sun all day long. There are only two leader outlets draining the entire roof which explains their large size. The oversized "bib" flange around the leader was just placed over the opening (and poorly at that) and not properly mortised flush with the bottom of this wood gutter. This "easy way out" practice leaves standing water that must evaporate as the outlet is higher than the bottom of the gutter. It also invites water under the flange where it will have an impossible time drying out and led to premature rot. |

| - 11 - Water is insidious and will find its way under this oversized unnecessary leading and surface caulking, eventually leading to rot. |
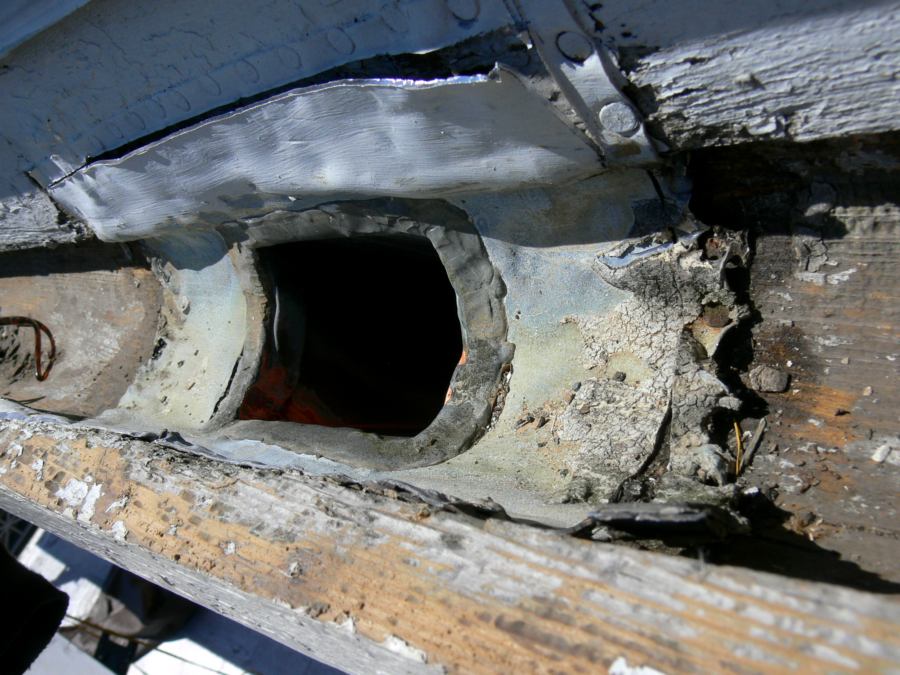
| - 12 - Notice the wood is wet under that caulking I just removed. The last rain was a week ago. |
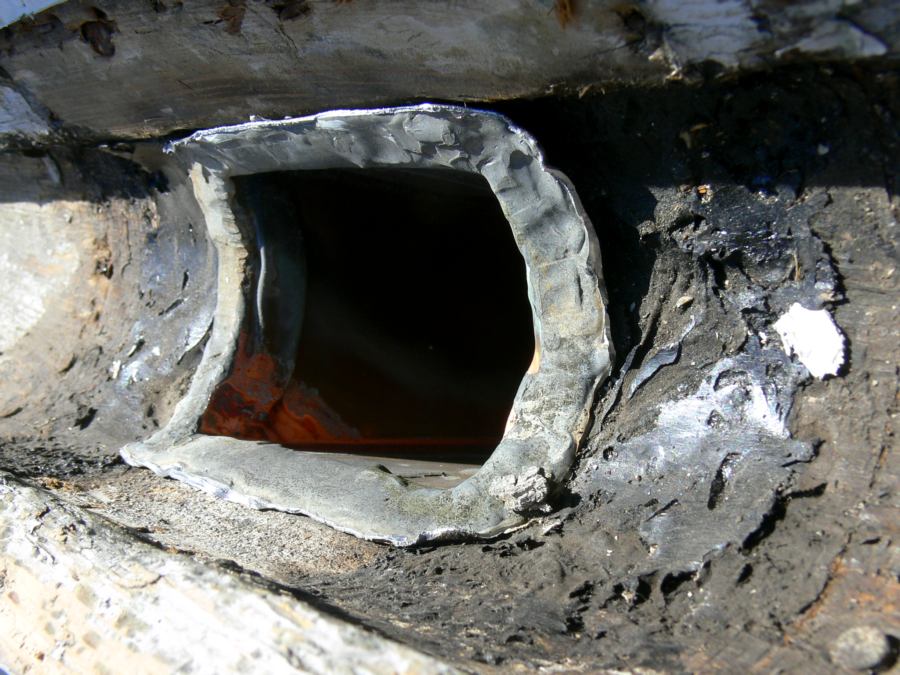
| - 13 - Was all that lead really necessary? Look at that void in the back and all that tar build up. |
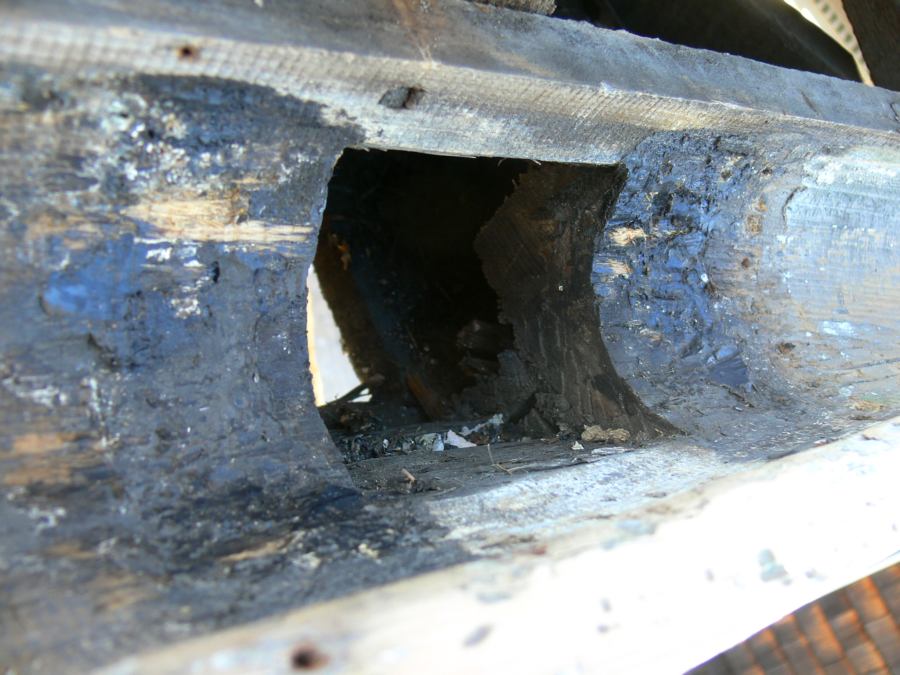
| - 14 - Luckily no rot! With all that tar gone now the outlet can be pounded into shape so that is sits down nice and low. This large drain should handle the heaviest thunderstorm as well as a heap of maple seeds that live in the area. |
| - 15 - On a wooden gutter the back is only 1/4" or so higher than the front. On aluminum gutters, the back is no higher than the front allowing them to spill both ways when the outlets are plugged. |
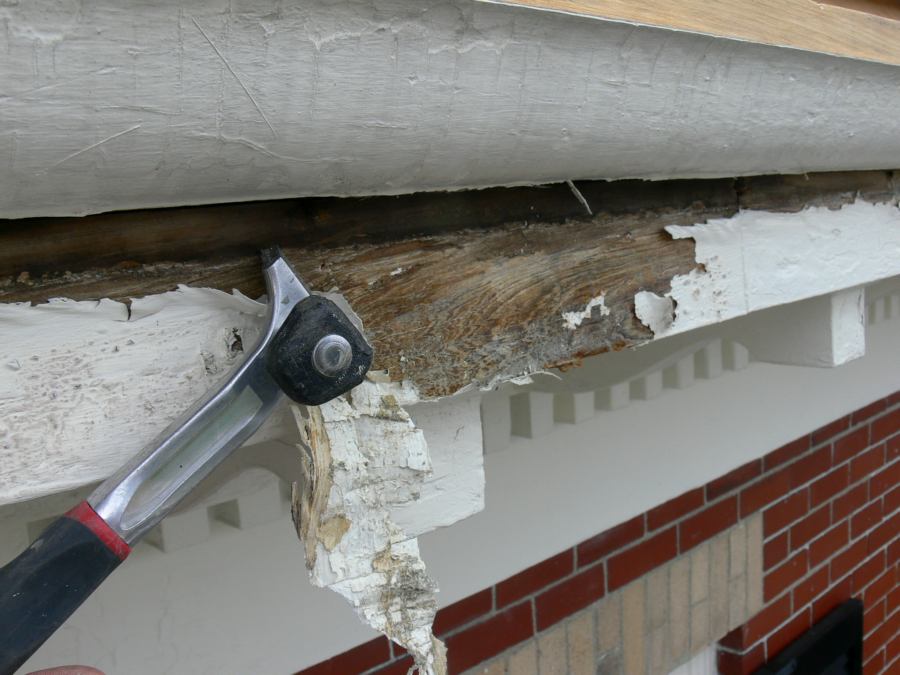
| - 16 - Notice the water staining on the back of this fascia board (and the old cut nails). The top side is facing front in the photo and the staining is clearly running from the roofing down into the soffit. |

| - 17 - The roofing now lays firmly on the sheathing with no more hollows. |
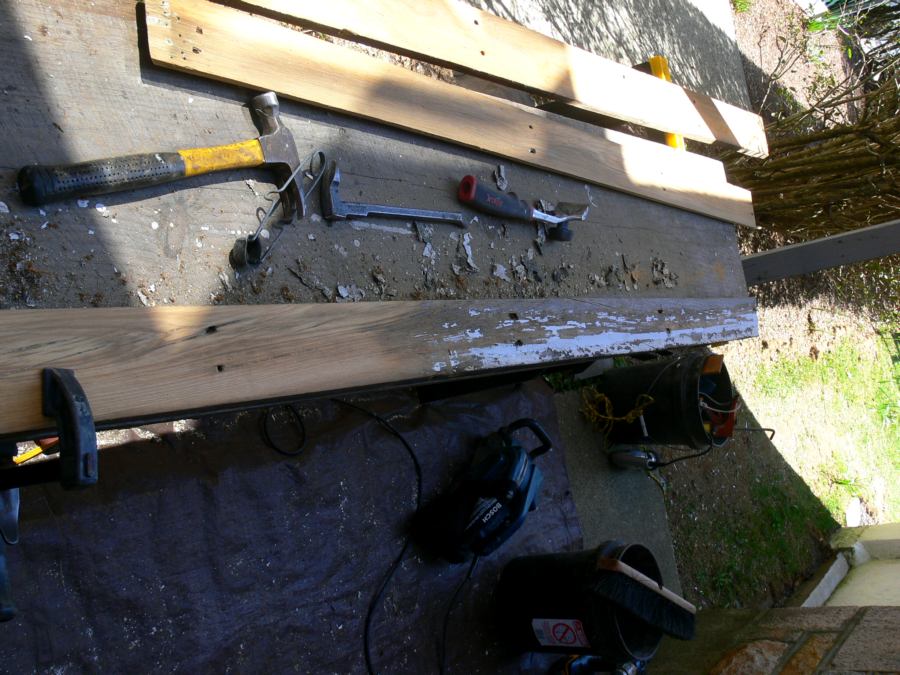
| - 18 - These fascia boards are from the east side and were soaking wet and unbelievably heavy when I removed them. They have been drying out for a couple of days in the sun while I moved along. They have lightened up noticeably (water is heavy). The boards looked like junk but upon paint removal and belt sanding proved to be very valuable - unbelievable rot resistant old growth swamp cypress! Any other contractor would have tossed them and installed pre-primed pine to save time and maximize profit. |
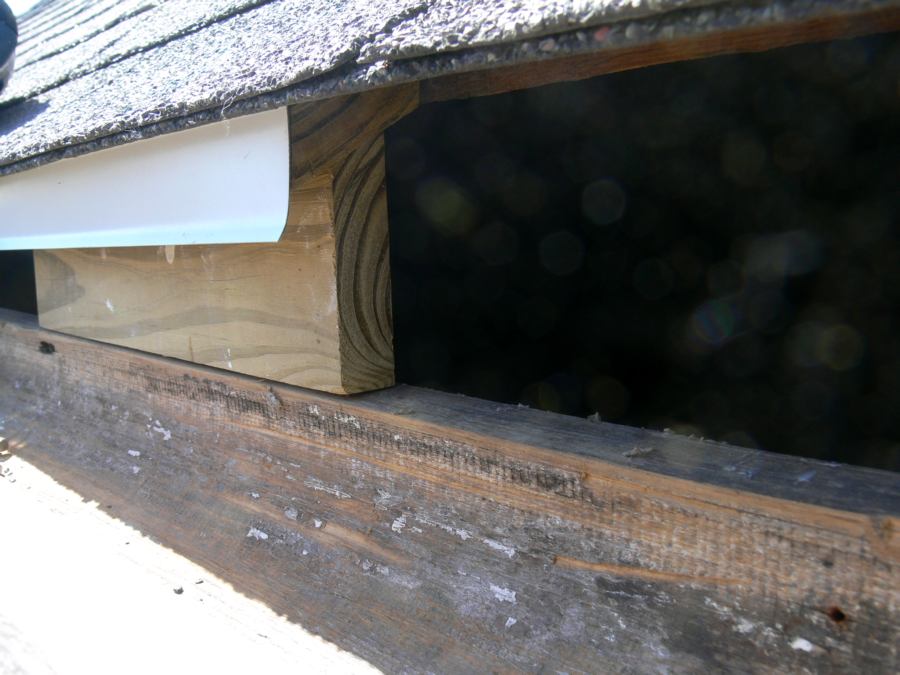
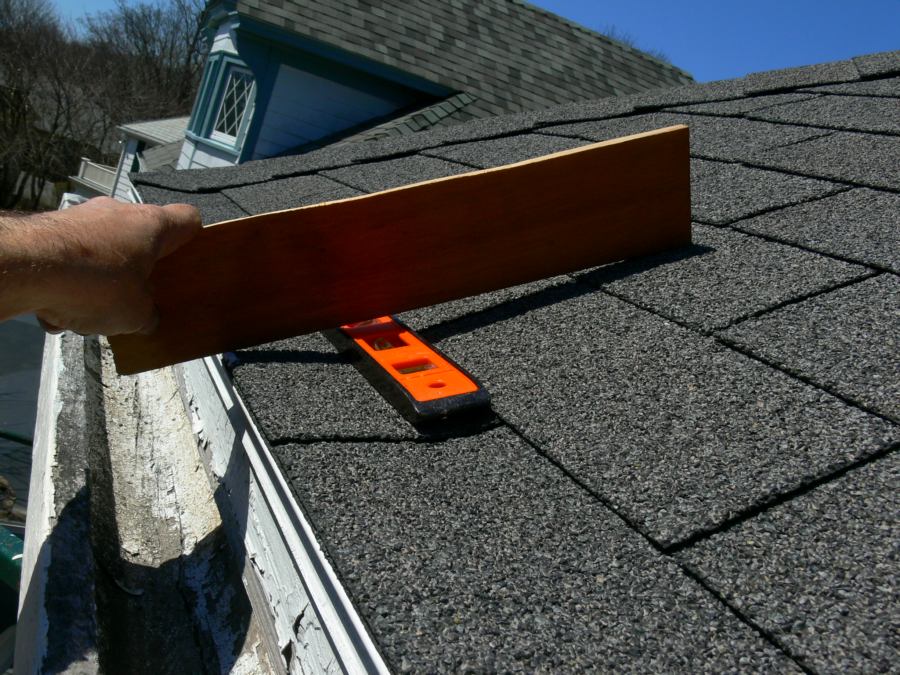
| - 19 - Here is a small mockup of what I need to do. Since there is a rather large gap between the fascia and the existing roof sheathing I'll add 2" of sheathing to the existing sheathing. This will provide solid support for the asphalt roofing and keep the dripedge off the fascia. Keeping the dripedge off the fascia prevents roof water runoff from running down the fascia, rather than dripping free into the gutter as it should. |
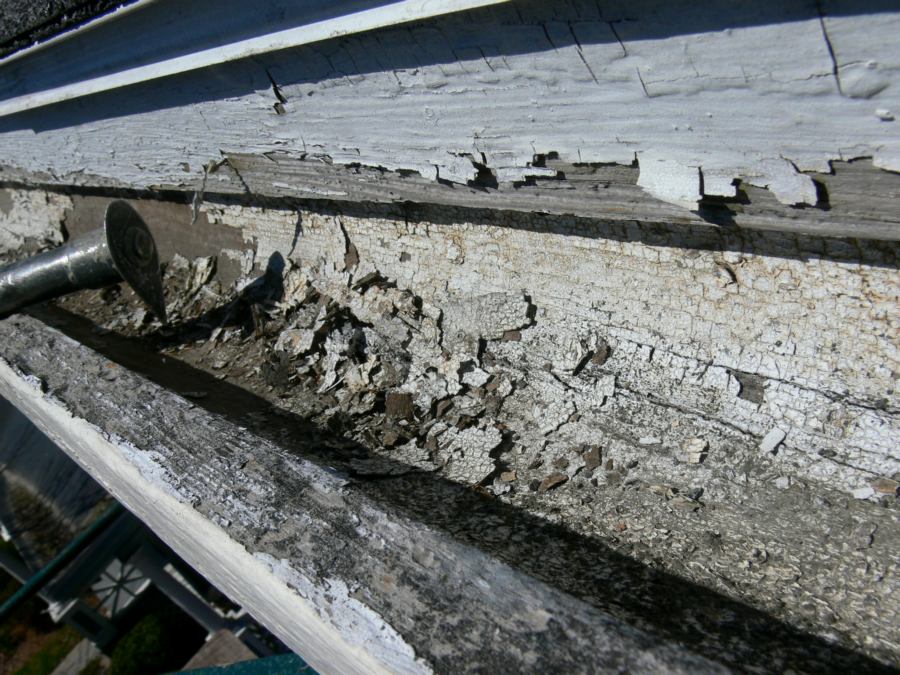
| - 20 - Notice how the paint is bubbling and separating from the wet wood. This is happening because water has been entering into the eaves, wetting the soffit and fascia. |
| - 21 - With this great stagging access and a windless day, this is a good time to strip all this old paint and start fresh. Paint is sacrificial. It has served its purpose over the years of protecting the wood. But with this many layers, being this cracked and alligatored, its time to go. |
| - 22 - A little heat and every layer comes off at once with a hand scrapper. Use a putty knife and you will gouge the wood. It's best to scrape. |
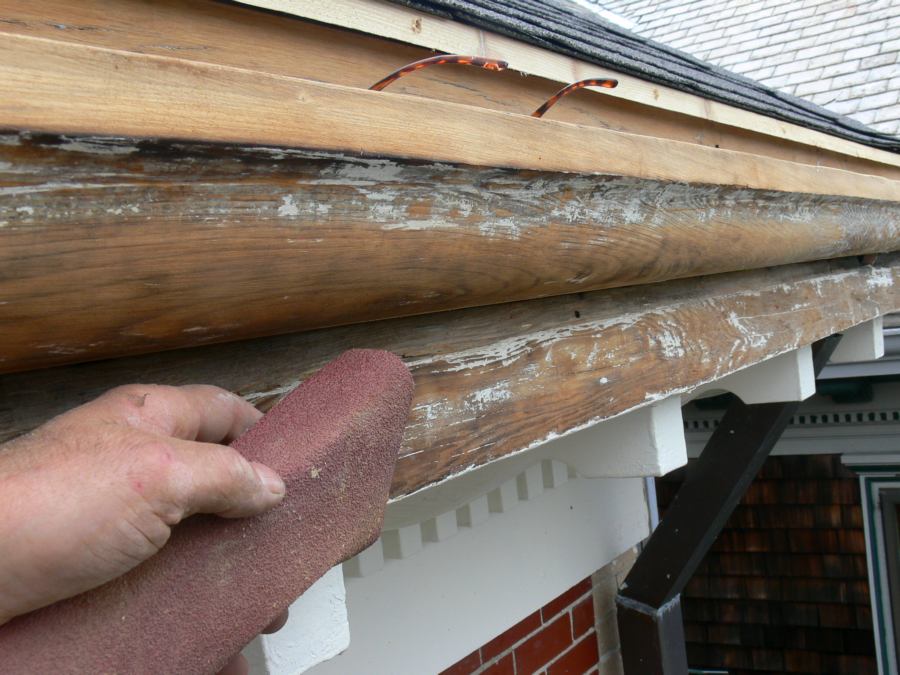
| - 23 - The scrappers job is done, now the 40grit sandpaper will bring this wood back to a looks brand new condition. Notice the new extended sheathing and now flat roofing. |
| - 24 - Old growth swamp cypress, superior to any wood that can be purchased today. |
| - 25 - People look at a house with decades of paint build up and think "vinyl". Wrong. Today's 100% acrylic paints are as good if not better than vinyl if applied properly. Today's paint have 25+ year guarantees. They don't crack, chalk and fade like oil paints that last 5 to 10 years at best. Well before 25 years is out, vinyl siding will look old, faded and chalky like a plastic lawn chair. Anybody can brush paint on, but most that do are only hoping it will stand up. There is a lot to know about painting. |
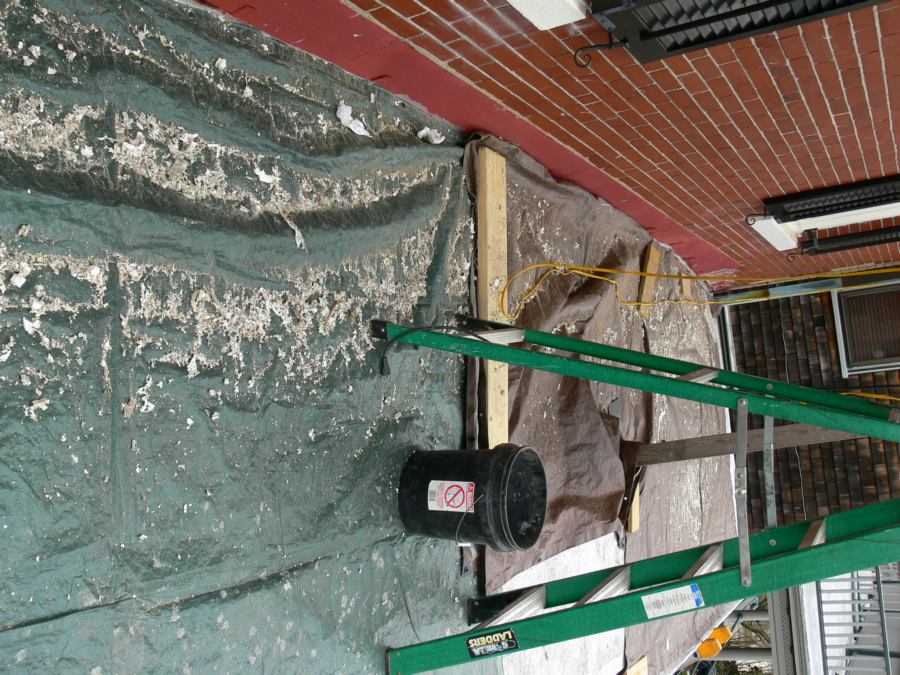
| - 26 - Zero wind today. Otherwise I would have do this another day. The paint chips fell straight onto the tarps for easy collection and proper disposal. |
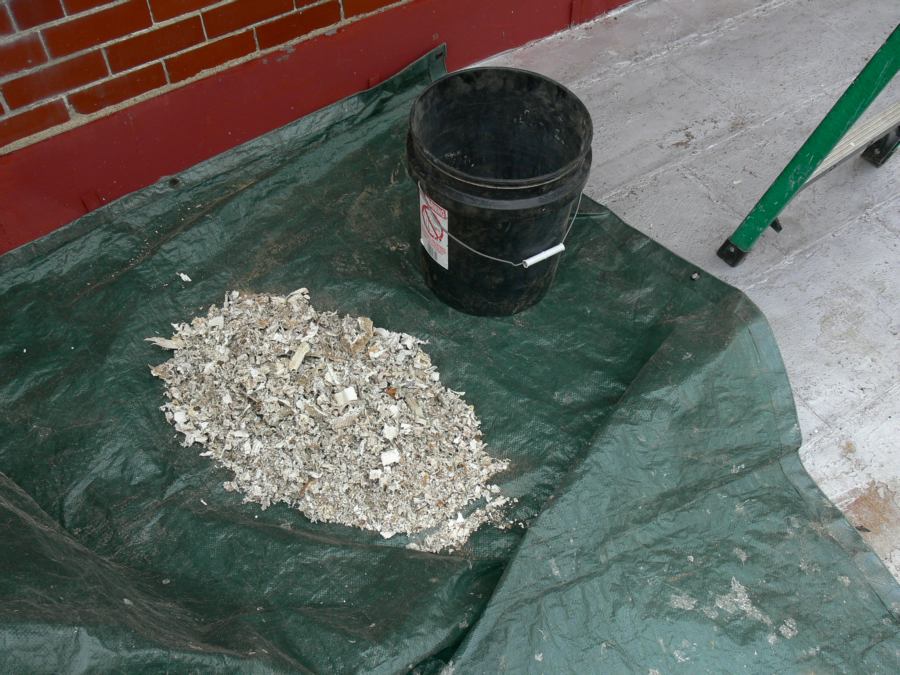
| - 27 - No brooming required, just lift the tarps and spill it into a pile. In the bucket it goes. These paint chips will catch on painters type drop cloths. |
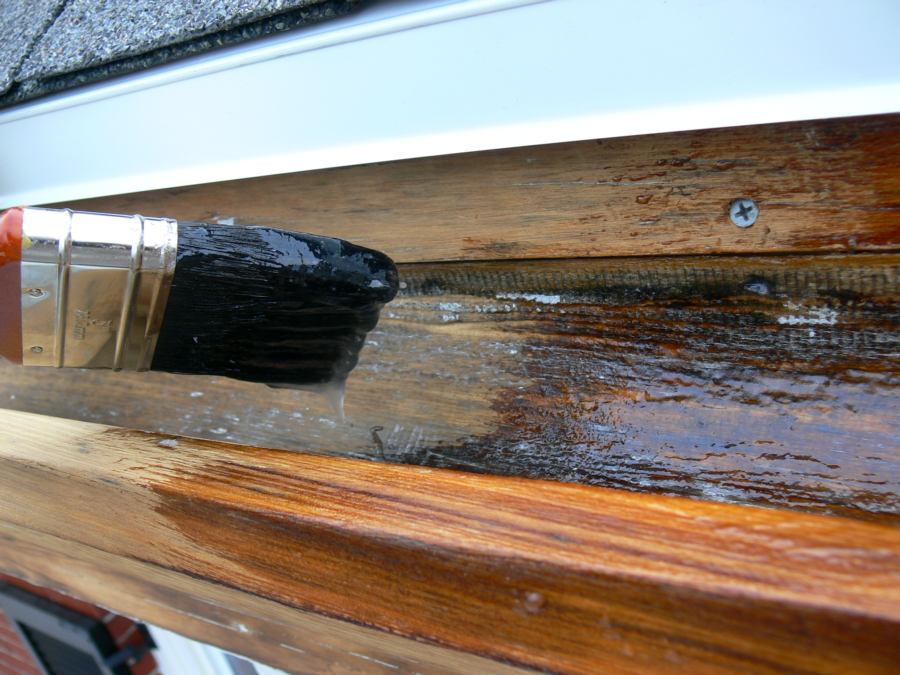
| - 28 - The new dripedge is now installed. With the wood gutter throughly dusted it's ready for multiple coats of Geocel's 2315LRF brushable liquid rubber. This product has a 30 year guarantee and eliminates the need for oiling wood gutters. |
| North gutter |
South gutter you are here |
East gutter |
rubbered flat roof |
|